Make a pretty family
tree to include at the beginning of your heritage albums.
Genealogy played a big part of scrapbooking in the beginning days
when most scrapbookers were primarily interested in capturing and
preserving their family history. It still does, but interests have
moved more towards scrapbooking for the pleasure of creative expression.
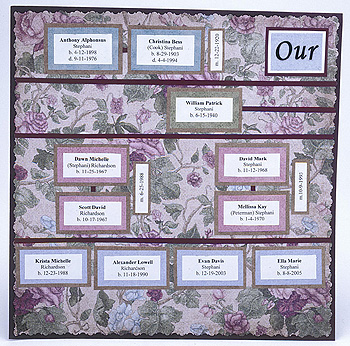
Every heritage album needs a family tree so people can see the
family connections clearly. You can present the information in
an attractive and personal way by using a little creativity. The
number of generations you include on your pages depends on the
size of your family.

Step 1: Prepare family tree. Look at your family
tree and decide on the number of generations you can fit on one
page. If you don’t have a current one, draw your family
tree on a piece of large paper. The easiest way is to draw horizontal
lines across the paper and have each space between the lines represent
a generation.
Step 2: Print names. Print family names and
information you want to include onto white paper. You will want
to include maiden names, birth dates, and death dates. Marriage
dates can be printed on a separate paper and placed between the
two people who were married. You can print by hand or use a computer.
Look at the longest name to determine the size of the rectangles.
Cut out a rectangle pattern that you can use for all of the names.
Trace the rectangle pattern around each name and information.
Cut out
Step 3: Prepare page You may have a small family
on one page or a larger family on two pages. If you have two pages,
place one side of the family on each page. Select a solid paper
for each page. Select a patterned paper and cut 1/4” off
each side with a decorative-edge scissor. Glue patterned paper
onto each page. Cut six 1/8” wide strips of paper the length
of the page. Place three or four strips on the page(s) to separate
the generations. Cut other strips in small pieces to connect names
of people who are married.
Step 4: Make title. Decide on a title for your
page(s). Print title by hand or use a computer. Cut a rectangle
around words. Mat with coordinating colors.
Step 5: Arrange names. Place names, strips,
and title on the page(s) and move them around until they are correctly
placed, adjusting the position of strips as needed. Place small
pieces of strips between names of people who are married.
Step 6: Mat names (optional). If you have room
for thin borders around the names, glue each name on color-coordinated
paper and cut around it leaving a thin border. Use a different
color for each generation. Place matted names back on the page(s).
Step 7: Finish. Glue all of the pieces on the
page(s).
|