Close Window Print Document

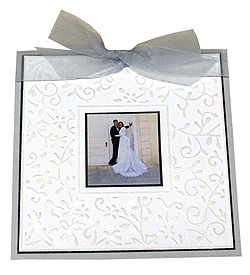
Wedding Card
Designed by Carlene Hunsaker
Presented by Nancy Hill

Materials Needed

One DCWV Inc. 5 ½” x 5 ½” Floral Embossed Card

DCWV Inc. Light Grey Textured Cardstock cut to 11 ¼” x 5 ¾”
DCWV Inc. Black Textured Cardstock cut to 5 5/16” x 5 5/16”, and 2” x 2”
Wedding Photo Cut to 1 7/8” x 1 7/8”
Archival Multi-surface chalk ink pad – Platinum
20” of Silver Organdy Ribbon
   
 
Instructions
1. 1. Fold the 11 ¼” x 5 ¾” piece of Light Grey cardstock in half lengthwise to make a square
2. 2. Adhere the 5 5/16” x 5 5/16” piece of Black cardstock to the Light Grey square card.
3. 3. Cut the back off the Floral Embossed card so you only have the embossed front.
4. 4. Lightly rub the Platinum chalk ink over the entire surface of the embossed card.
5. 5. Trim the embossed card to 5 ¼” x 5 ¼”
6. 6. Adhere the colored embossed card to the black 5 5/16” x 5 5/16” cardstock which you centered on the Light Grey card.
7. 7. Mount your favorite wedding photo to the 2”x 2” square of black cardstock
8. 8. Adhere the matted wedding photo to the center of the floral embossed card.
9. 9. Pull the silver organdy ribbon through the card and tie it in a bow. Trim excess ribbon.
   
Sponsor: Die Cuts with a View


Close Window Print Document