Close Window Print Document

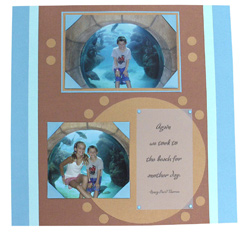
Sydnee & Isaac in the Bahamas 12” x 12” Page
Designed by Carlene Hunsaker
Presented by Nancy Hill

Materials Needed

DCWV Inc. Robin’sEgg 2 Textured Cardstock – one 12” x 12” sheet and one 5 3/8” x 6 3/8” sheet

DCWV Inc. Robin’s Egg 3 Textured Cardstock cut to 12” x 10”
DCWV Inc. Rust 1 Textured Cardstock cut to 12” x 8 ¾”
DCWV Inc. Rust 3 Textured Cardstock cut into one 4 ¼” x 6 ¼” sheet, one 8” circle, and 12 - ½” circles
1/2” circle punch
DCWV Inc. Robin’s Egg 5/8” adhesive ribbon
DCWV Inc. Robin’s Egg Mini Brads
DCWV Inc. Travel Vellum Quote
   
 
Instructions
1. 1. Adhere the 12” x 10” Robin’s Egg 3 cardstock to the center of the 12” x 12” piece of Robin’s Egg 2 cardstock – see sample for positioning
2. 2. Adhere the 12” x 8 ¾” piece of Rust 1 cardstock to the center of the 12” x 10” Robin’s Egg 3 cardstock – see sample for positioning
3. 3. Position the 8” Rust 3 circle at the bottom right of the page and adhere it – see sample for positioning
4. 4. Adhere the 5 3/8” x 6 3/8” sheet of Robin’s Egg 2 cardstock centered at the top of the page.
5. 5. Adhere the 4 ¼” x 6 ¼” Rust 3 cardstock to the 5 3/8” x 6 3/8” Robin’s Egg 2 cardstock
6. 6. Cut the Robin’s egg adhesive ribbon into 8 – 3” strips.
7. 7. Create photo corners by pulling the adhesive backing off the ribbon and folding the strips over the corners of your two photos.
8. 8. Adhere the 4” x 6” photo cornered photo to the 4 ¼” x 6 ¼” sheet of Rust 3 cardstock.
9. 9. Adhere a 4” x 4 ¼” photo cornered photo to the bottom left of the page over the 8” Rust 3 circle – see sample for positioning
10. 10. Choose a Travel Vellum Quote you want and adhere it to the page using 4 Robin’s Egg mini brads.
11. 11. Punch 12 – ½” circles using an ½” circle punch from the Rust 3 cardstock
12. 12. Arrange and adhere the 12 circles to the page – see sample for positioning
   
Sponsor: Die Cuts with a View


Close Window Print Document