| Deciding how to arrange your
photos on pages is challenging for most people, so I’ve
come up with a system to make it easier to get over that
first hurdle. There are so many enjoyable aspects of scrapbooking,
and I don’t want anyone to miss out on the fun!
First of all, you want to be familiar with two terms that
we use in publishing all of the time when we are working
on our magazines and books. How you arrange everything on
a page is called a page layout. Select your favorite page
layouts from books and magazines and file them away for
a quick reference as thumbnail sketches—quick drawings
that record the basic elements on the page. Set up your
filing system on note cards or in a handy notebook so you
can take them wherever you go. When you're ready to start
a new scrapbook page—pick a layout—and you’re
ready to start working on your page! Follow these four easy
steps . . .
Collect
your favorite layouts.
Look for pages that are appealing to you in magazines or
books. You may also find them in a friend’s album
or at a crop party. Select pages that have different arrangements
of photos and use different numbers of photos on the pages.
You will not be trying to capture all of the details of
the pages—just the layout of the basic elements like
the photos, title, journaling and prominent details. Your
personal photos will obviously be different, and your choices
of paper and details depend on the materials you find or
have on hand. All you need are the basic page layouts to
get you started.
Draw a quick thumbnail sketch.
Remember that your sketch should be quick to be efficient.
It doesn’t need to be fancy, and you don’t need
to use a ruler or have it too exact. You just want a rough
idea of what the page looks like.
• Make patterns (templates): For 8 ½”
x 11” pages, draw a 1 3/4” x 2 3/8” rectangle
onto cardstock or plastic. Cut out. With black marker, trace
around pattern onto notebook page or note card. Trace around
pattern twice, close together, to represent a spread (two
pages that go together.) In same way, for 12” x 12”
pages draw a 2 1/4”x 2 1/4” square.
• Sketch layouts: Draw squares and rectangles to
represent photos, titles, and journaling. Number the photos
and label the title and journaling with a T and J. Use an
asterisk to indicate the position of prominent details.
Add quick notes if there is something you want to remember
about the page or pages. Here are two examples.
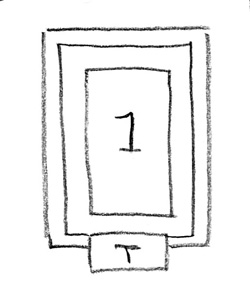
One-photo page
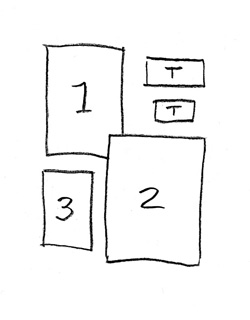
Three-photo page
File your sketches on note cards.
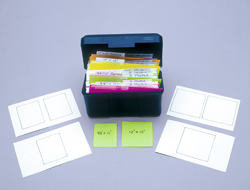
What
you need:
- Page Layout Note Cards
- Unlined 3” x 5” note cards
- Optional: unlined colored cards for dividers
- Note card box
- 28 Clear 2” index tabs
- Adhesive, black marker, pencil, ruler, scissors
File
your layout sketches by the size of the page and the number
of photos on the page.
Step 1: Main Heading Dividers. Attach
index tabs to the divider cards. Print the following information
on the paper strips provided. Insert strips into the plastic
tabs. 8 ½” x 11” Pages
- 8 ½” x 11” Spreads
- 12” x 12” Pages
- 12” x 12” Spreads
Step 2: Sub Heading Dividers. Attach index
tabs to the cards that will be the dividers. Print the following
information on the paper strips provided. Insert strips
into the plastic tabs.
Behind 8 ½” x 11” Pages and 12”
x 12” Pages dividers, label cards with the following:
1 Photo, 2 Photos, 3 Photos, 4 Photos, 5 Photos
Behind 8 ½” x 11” Pages and 12”
x 12” Pages dividers, label cards with the following:
1 Photo, 2 Photos, 3 Photos, 4 Photos, 5 Photos, 6 Photos,
7 Photos
Choose
a layout from your collected sketches whenever you’re
ready to begin a new scrapbook page or pages.
To use your handy layout reference, all you need to do
is decide what size page you are using and how many photos
you want on the page. The size of your photos and whether
your photos are horizontal or vertical will determine which
layout you choose. Let’s say you have three photos
(two vertical and 1 horizontal) that you want to place on
one 12” x 12” page. Look behind the main heading
of 12”x12” Pages and then look behind 3 Photos.
Look at your layouts to find one that has 2 vertical and
1 horizontal photos on it. You’re ready to go!
For my page below, I looked up 3 Photos behind the 12”
x 12” Pages heading. I found a layout that had 3 vertical
photos on it and created my page.
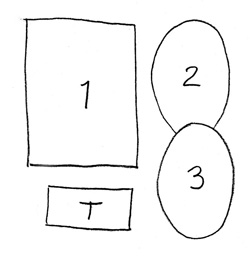
3 vertical photos on a 12”
x 12” page |