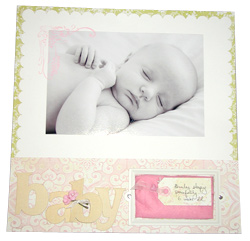
Make a Pincushion
on a Page
By Leslie Ayers
|
| Materials
Needed |

|
 |
Metal bookplate |
 |
Chipboard sheet as wide as layout or
project |
 |
Craft knife |
 |
Cutting mat |
 |
Patterned paper |
 |
Soft fabric |
 |
Fabric scissors |
 |
Dry adhesive runner or adhesive dots
|
 |
Pillow stuffing |
 |
Anywhere hole punch |
 |
Decorative straight pins |
| |
|
| |
| Instructions
|
| 1. |
1. Trim a piece of chipboard to the width of your
project, and as high as you need it to be to extend at least 1 inch
beyond the top and bottom of the bookplate. Trace the inside dimensions
of the bookplate onto the middle of the chipboard piece. With a
craft knife, cut out the opening for the pincushion that you have
traced onto the chipboard. |
| 2. |
2. Place a piece of patterned paper or cardstock over
the chipboard and trace around the window you just cut. Cut out
and set aside. |
| 3. |
3. Cut a piece of soft fabric about 1 to 1.5 inches
larger than the window in your chipboard. Apply dry adhesive all
the way around the window in the chipboard, sticking close to the
edges. With the backside of the chipboard facing up, lightly lay
the fabric over the window and, holding the chipboard off your work
surface, gently poke the middle into the window, without allowing
the fabric edges to fall through completely. |
| 4. |
4. When you’re satisfied with the amount of
space for your pincushion, press the edges of the fabric around
the edge of the window in the chipboard firmly to adhere. Take a
small amount of pillow stuffing and place it onto the pincushion
from the back. Cut another piece of chipboard about 0.5 inch smaller
all the way around than the main piece of chipboard, apply dry adhesive
to it, and use it to back the pincushion. |
| 5. |
5. Turn the piece over and apply adhesive to the patterned
paper you cut out earlier. Lay the bookplate over the pincushion
and mark the holes for the brads on each side. Punch holes using
an anywhere hole punch. Place the bookplate over the pincushion
again and place brads in the holes to set into place. Insert decorative
stick pins into the pincushion, and attach tags or other embellishments,
as you wish. Attach the entire thing to a layout using strong dry
adhesive. |
| |
|
| Sponsor:
Scrapbook Answers |
|