 The
quickest way to complete a digital page – or even a
digital album – is to purchase a “quick page”
from your favorite digital designer. There are even some free
pages available on the internet! And they are so easy to use. The
quickest way to complete a digital page – or even a
digital album – is to purchase a “quick page”
from your favorite digital designer. There are even some free
pages available on the internet! And they are so easy to use.
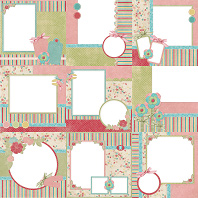
You’ll find two types of “quick pages”
– those you put your photos and journaling on top
of, and those with “transparent” portions of
the page where you put your photos underneath the page and
your journaling on top. Let’s start with the first
type:
Adding photos & journaling on top of a quick
page
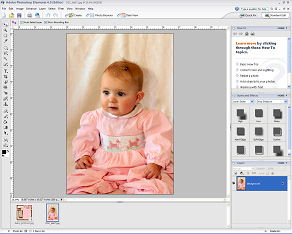
Step 1: Open the quick page in Photoshop
Elements, and open the photo(s) you wish to add to the quick
page by going to File | Open. Both files
will show up in your photo bin.
 Step
2: With your photo in the main work area of PSE,
click on your Move Tool (keyboard shortcut V).
Now click on your photo and drag it down to the quick page
in the photo bin. This will add your photo in a separate
layer on top of the quick page. Step
2: With your photo in the main work area of PSE,
click on your Move Tool (keyboard shortcut V).
Now click on your photo and drag it down to the quick page
in the photo bin. This will add your photo in a separate
layer on top of the quick page.
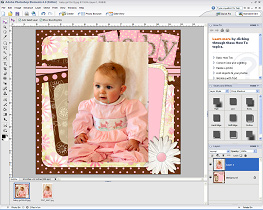
Step 3: You can now resize your photo and
position it on the quick page by using the Move
Tool (V). You’ll want to be sure to hold
down your Shift key while you resize your
photo in order to keep the aspect ratio the same. Repeat
these steps for any additional photos you want to add.
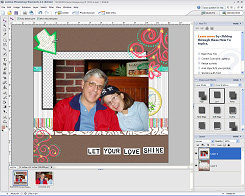
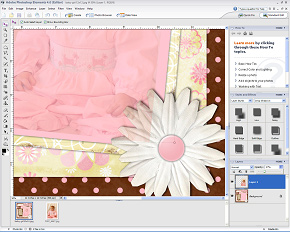 Step
4: Not all quick pages will have this issue, but
with this one you can see that part of the flower is hidden
by our photo. In order to erase the part of the photo that
is hiding the flower, we’ll first zoom in by using
the Zoom Tool (Z) or by using the keyboard
shortcut Ctrl +. Next we’ll click
on the photo layer in the layers palette and lower the opacity
of the layer so we can see the flower through the photo.
Then we’ll simply use our Eraser Tool (E)
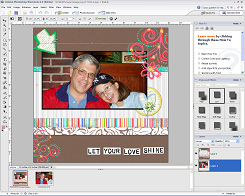
to remove that portion of our photo! Once you’re done
the flower will appear to be on top of your photo! Step
4: Not all quick pages will have this issue, but
with this one you can see that part of the flower is hidden
by our photo. In order to erase the part of the photo that
is hiding the flower, we’ll first zoom in by using
the Zoom Tool (Z) or by using the keyboard
shortcut Ctrl +. Next we’ll click
on the photo layer in the layers palette and lower the opacity
of the layer so we can see the flower through the photo.
Then we’ll simply use our Eraser Tool (E)
to remove that portion of our photo! Once you’re done
the flower will appear to be on top of your photo!
You might also want to add a drop shadow to your photo by
choosing Layer Styles and Drop
Shadows in the Styles & Effects
palette.

|
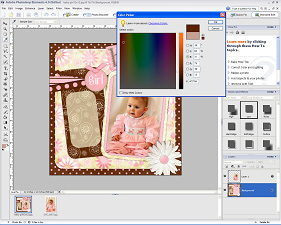
Step 4: Add your journaling by clicking
on the Text Tool (T). Select the color
of your font by clicking on the color box. This will
bring up the Color Picker, which will allow you to pick
any color in the range shown. OR if you move your mouse
outside the box, it automatically changes to the Eyedropper
Tool (I), which will allow you to “pick
up” any color from your layout or photo! |
When you add journaling a new layer will automatically
be created.
Adding photos & journaling to a quick page
with transparent areas
|
Step 1: Open the quick page and
the photo(s) you want to add.
Step 2: With your photo in the main
work area of PSE and using the Move Tool (V)
drag your photo down to the quick page in the photo
bin. This will add your photo in a separate layer
on top of the quick page.
Step 3: This is where the process
differs from the first type of quick page. Because
the quick page has a transparent area, you’ll
want to change the order of your layers so your photo
is underneath the quick page. Just click your mouse
on the photo layer and drag it under the quick page
layer – that’s all there is to it! You
can still resize your photo and move it around on
the page as before.
Step 4: Add your journaling just
as you did in Step 4 above!
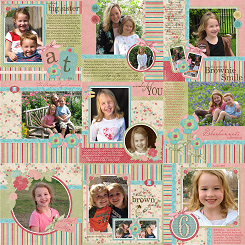
You can even find entire mini-albums created by designers
who have done all of the work for you!
|
|
Credits:
Baby page created by Angela Moffatt using the Birthday
Cake kit by Dani Mogstad www.designbydani.com.
Let Your Love Shine page Quick page from the "Shine"
Kit by Michelle Underwood at www.scrapbookbytes.com.
Mini Album (Flea Market Chic – Piece-a-cake Album)
from The Shabby Princess www.theshabbyshoppe.com.
Finished page by Leigh Brown.
|
