Epson Computer
Tip – Quick & Easy Digital Scrapbooking
Using Digital Scrapbooking Kits to Create
A Beach Themed Digital Scrapbook Page
By Barbara Kotsos
 For
project ideas and more, visit www.epsoncreativezone.com For
project ideas and more, visit www.epsoncreativezone.com
|
|
|
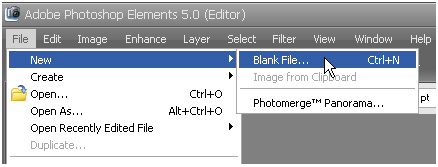
| 1. |
Open Adobe Photoshop Elements
5.0. Create a new file (File- New- Blank File).
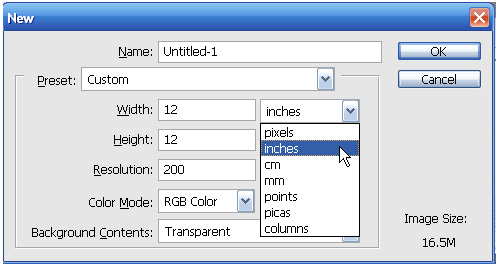
Enter the desired scrapbook page size into the boxes as shown below.
(Access inches by clicking on the drop down arrow if necessary.)
If you don’t have access to 12x12 prints, you might try 8x8
or 8x10.
For good print quality, always use at least 200
pixels per inch in the resolution box.
|
| 2. |
Open your photos (File – Open).
Browse your hard drive to find the photos you wish to include in
your scrapbook layout. Then click Open. Your photos will open in
the same workspace as your new file and also show in the Photo Bin
at the bottom of the workspace. |
| 3. |
Open your graphics (File –
Open). Browse your CD drive or your hard drive to find your desired
graphics. Your graphics will open in the same workspace as your
photos and new file and also show in the Photo Bin at the bottom
of the workspace.
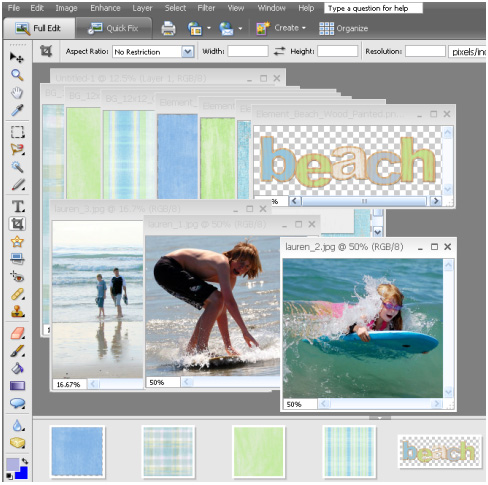
To easily access any of the files, click on it in the Photo Bin
and it will move to the top in the workspace. If you only see one
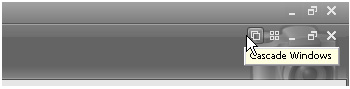
file in the workspace, click the left icon on the top right of the
workspace (shown below) to change to Cascade Windows mode. This
will show all your files, with the selected one on the top.
|
| 4. |
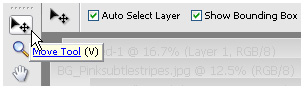
Click on your new blank file to bring
it to the top of the workspace. This will be your layout file. Then
do the same with the background of your choice. You can move the
files around on the workspace by clicking and dragging on the top
bar of the image window, using the Move Tool (the top tool in the
Toolbar).
|
| 5. |
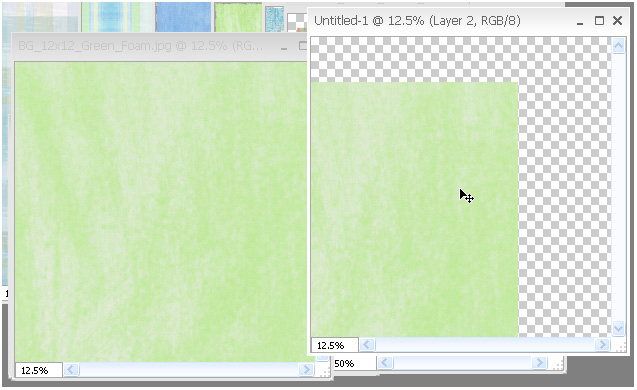
Using the Move Tool, add a background
by clicking anywhere on the background file and drag the file onto
the new blank image. Then drag it into place with the Move Tool.
You may now close the background file.
|
| 6. |
Next add a photo. Click on your first
photo in the Photo Bin to bring it to the top in the workspace.
Using the Move Tool, click and drag it onto your layout.
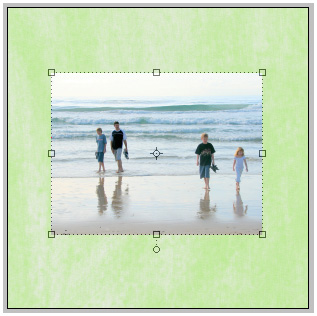
You
will notice that the image has a “bounding box” around
it which allows you to rotate and resize the image. To do this,
click on one of the small boxes at the corners of the bounding
box and drag in or out to resize. By default this tool is set
to constrain proportions, so it will resize without distorting
the image.
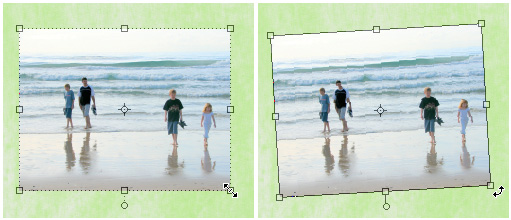
If you wish to rotate your image, hover your mouse outside the
corner of your image. You will see a small set of arrowed angles
appear. Click and drag to rotate your image in any direction.
To commit your change, click on the small green arrow or press
Enter.
|
| 7. |
For a scrapbook layout to look realistic,
add a drop shadow to your photo with a Layer Style.
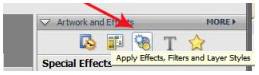
On the right
side of your workspace in the Artwork and Effects palette, click
on the icon that looks like a sun and other shapes. This opens
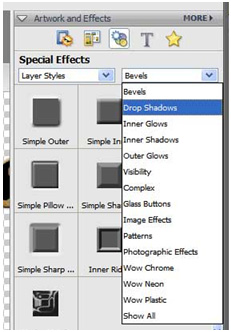
the Effects Filters and Layer Styles Palette. Choose Layer Styles
from the left drop down box and Drop Shadows from the right drop
down box.
Double click on the “Low” option to apply it to the
photo layer.
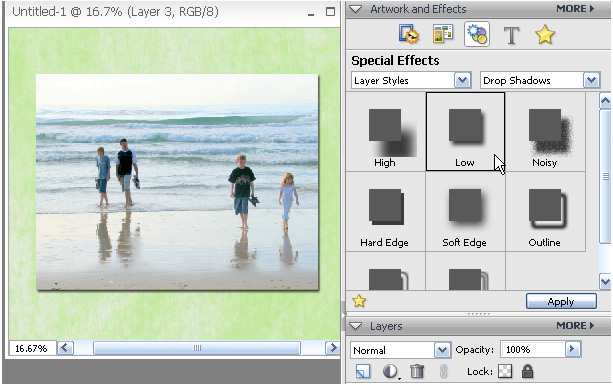
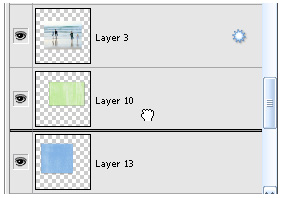
You can adjust the amount and opacity of the drop shadow by clicking
on the sun shape (layer style) in the Layer palette as shown below.
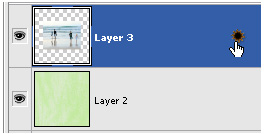
Double click to open a dialog box with sliders and adjust the
shadow to your desired preference.
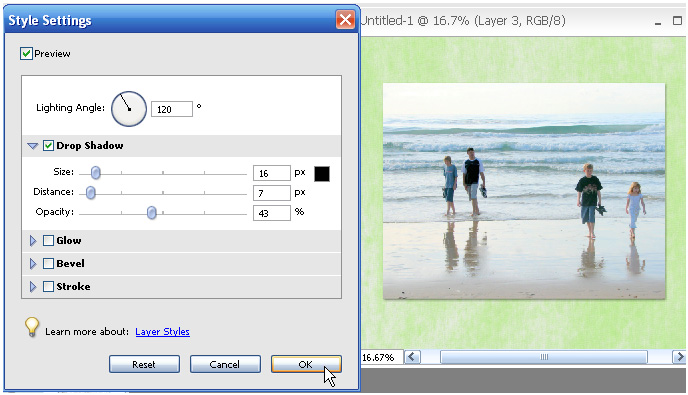
Most Digital Scrapbook Place graphics come complete with an
appropriate drop shadow and need no extra shadow added. Remember
to add shadows to each of your photos for realism.
|
| 8. |
Add remaining photos and embellishments.
Now click on the embellishment file you wish to add next in the
Photo Bin. Using the Move Tool as before, click and drag it onto
your layout and position where you desire. Repeat this procedure
with any additional photos or embellishments you wish to add to
your layout. Each item will be added in its own layer automatically
in your layout file.
You can move any of the items in your layout
at a later date by clicking on the relevant layer in the Layer
palette to select that item. You can also move any item above
or below another item by clicking on the relevant layer in the
Layers palette and dragging it above or below another layer.
|
| 9. |
To add journaling to your layout, click
on the Type Tool in the Toolbar.Then click on your layout and drag
a rectangle where you wish to add a text box.
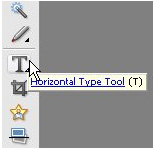
Type your desired
text then click on the text layer in the Layers palette, the Text
Tool, or press Control Enter to apply your text to the layout.
You can alter the color and font choices in the Options Bar at
the top of the workspace.

Using the Move Tool, you can move and rotate your text box just
like other files.
|
| 10. |
When you are happy with your layout,
save your file (File – Save As) as a Photoshop file (.psd)
with a unique name in a folder on your hard drive. This file will
remain with all layers intact and you will be able to reopen and
edit it at a later date.

|
| 11. |
Print your layout according to your
printer’s specifications. For 12x12 pages, you will need a
wide-format printer, such as the Epson
Stylus Photo R1800. Otherwise, search online or in your local
area for photo stores offering 12x12 prints. |
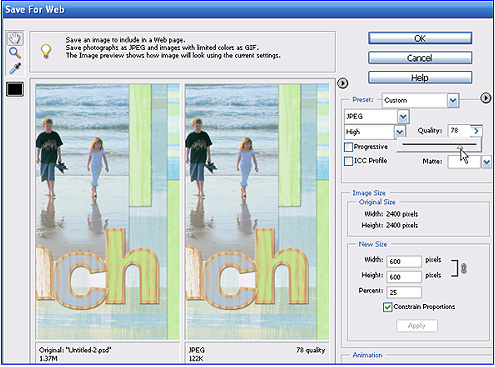
| 12. |
To make your layout file small enough
to upload to a website or share by email, use the save for web function
(File- Save for Web). This will open a new window with two versions
of your layout, the original and the new resized file. In the New
Size box, reduce the size to 600px. Be sure Constrain Proportions
is checked and click Apply. Under Preset, select JPEG from the drop
down menu on the left. Then adjust the quality slider on the right
until your file size is under 125 kb. You will see the file size
under the resized file image. Click OK.
A dialog box will prompt you for a file name. Save with a unique
name such as originalfilename_web.jpg. This version will be flattened
and will no longer be editable, but it will be a perfect size for
emailing to friends and uploading to websites such as www.digitalscrapbookplace.com.

|
| |
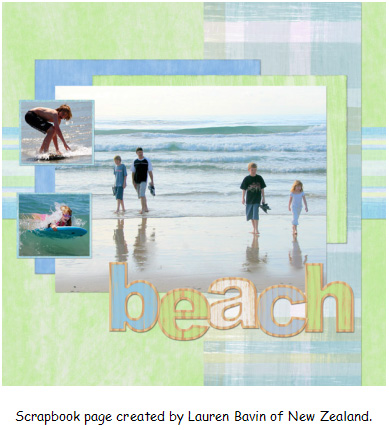
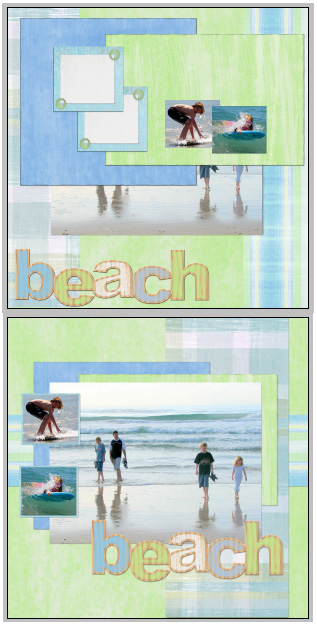
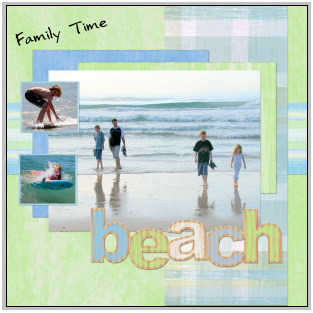
Graphics from the Beach Retreat Page Kit
on the Scraps of the Season – Beach CD by Digital Scrapbook Place.
|
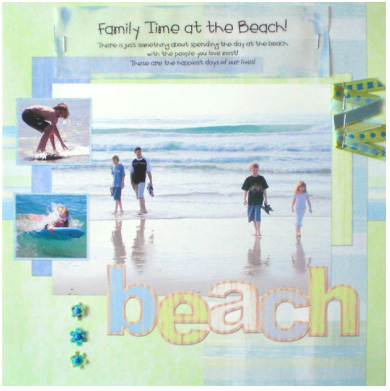
ADD
TRADITIONAL EMBELLISHMENTS (Optional) |
If you
desire, you may also add traditional scrapbooking embellishments
and hand written journaling to your printed layout.
The items used below are Die Cuts With a View blue mini brads,
FolkArt Light Blue Paint, yellow & blue "confetti",
Michael's ribbon (dashes, dots & checks, textured trios),
staples, and vellum paper.
This is just one example of what you can do to embellish a
digital scrapbook layout. Use your favorite products and techniques
to embellish your pages and show off your own unique creativity.
TRADITIONALLY EMBELLISHED DIGITAL SCRAPBOOK LAYOUT
|
|
Adobe,
the Adobe logo, and Photoshop Elements are either registered trademarks
or trademarks of Adobe Systems Incorporated in the United States
and/or other countries.
©2007 Digital Scrapbook Place, LLC. Phone: 816-396-5606
Fax: 816-396-5607 Web: www.digitalscrapbookplace.com
|
| |
|