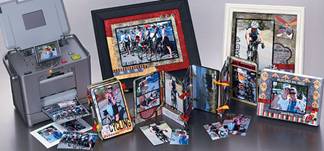
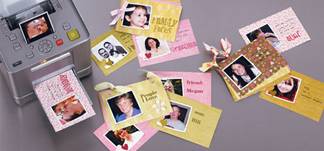
You may have seen one of the popular personal photo lab printers at a party or crop. You may have used one of the PictureMate printers to print out a stack of your digital photos. These portable machines produce fade, smudge, scratch and water resistant prints with brilliant quality - prints that make perfect mini-scrapbook pages.
The PictureMate is more than a pictures-only machine. Get the most from your personal photo lab by using it to produce quick and easy scrapbook pages!
Quick Page Album:
An easy way to create a PictureMate mini-album is to use a set of pre-designed quick pages available at no charge on epsoncreativezone.com.
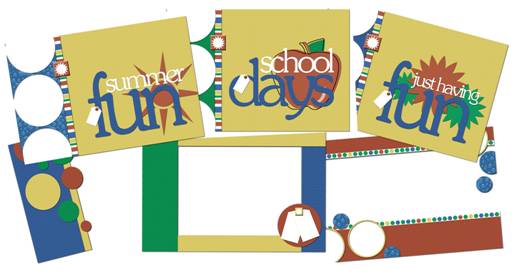
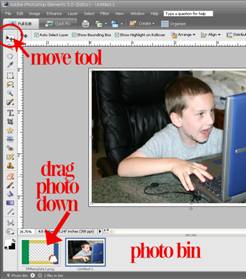
These versatile pages are easy to customize using a graphics editing program such as Photoshop Elements. After downloading the pages, open a page and a few digital photos in your software. Use the Move Tool to drag your photo on top of the quick page in your photo bin.
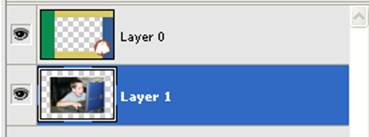
The quick pages include transparent windows which are indicated by the grey checkerboard pattern. To move the photo behind the window, drag the photo under the quick page in the Layers Palette.
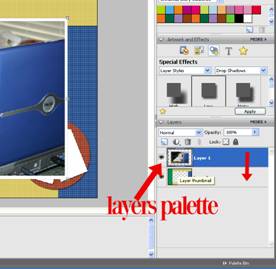
Use the Move Tool and drag the photo around to position the picture within the window.
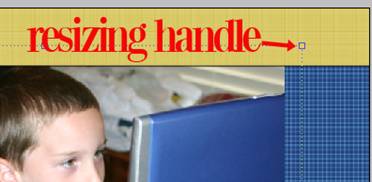
To resize the photo, click and drag one of the squares at the corner of the photo.
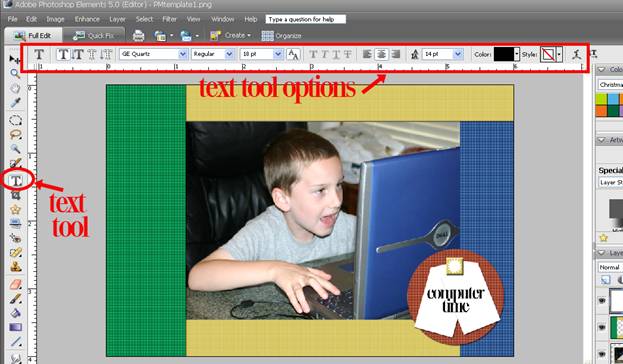
To add text to your quick page, click on the quick page to select the page layer. Next, select the Text Tool. Across the top of your editing window, the tool options allow you to select a font, size, color and style. When you have chosen your options, begin typing on top of the quick page.
When you are satisfied with your page, you are ready to print. Connect the PictureMate to y our computer with a USB or FireWire cord. Select File | Print to view the Print Preview dialog.
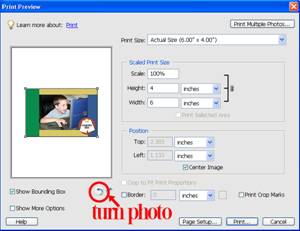
Flip your photo to fit on the page using the curved arrow buttons, then select Print.
Choose PictureMate as your preferred printer.
Alternatively, you can save your layout to your camera card. Using a card reader, drag your saved layout to the camera card folder. Use the card to print your layout on the PictureMate.
Designing Your Own Mini-Album Pages:
Digital scrapbooking, like traditional scrapbooking, gives you the ability to create pages in any size you like. Using digital scrapbooking page kits from epsoncreativezone or your favorite digital scrapbook store, you can design your own mini-pages to print on the PictureMate. Simply create 4x6 inch pages in your favorite graphics editing program.
Creating a 4x6 inch Canvas:
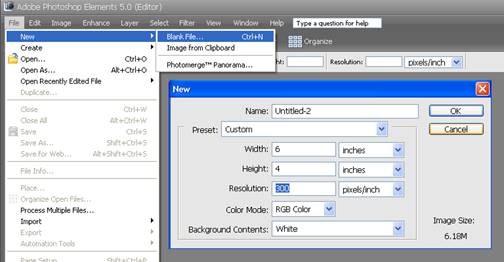
In Photoshop Elements, open a 4x6 inch document by selecting File | New | Blank File.
In the New document window, create a file that is 6 inches by 4 inches at 300 pixels/inch. Select RGB Color Mode. This creates a new blank document in your editing window.
Use this new document to design your own scrapbook page by dragging photos, background papers and embellishments on top of it.
Using Digital Papers:
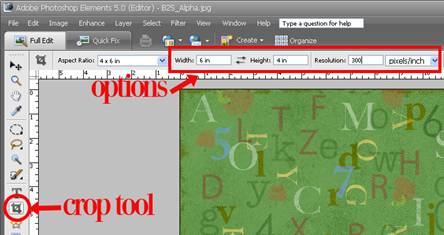
You may have downloaded a digital scrapbook kit or a few papers you'd like to use to design your scrapbook page. To use a full-size digital paper as your background, open the page in Photoshop Elements. Select the Crop Tool. Type a width of 6 inches, a height of 4 inches and a resolution of 300 pixels/inch in the options bar. Drag your cursor over the scrapbook page, then hit Enter on the keyboard to crop the page. Finish the page by dragging photos and embellishments onto the cropped background.
If you would like to learn more about digital scrapbooking, you can find  in-depth instructions at: in-depth instructions at:
Using layouts you have already created:
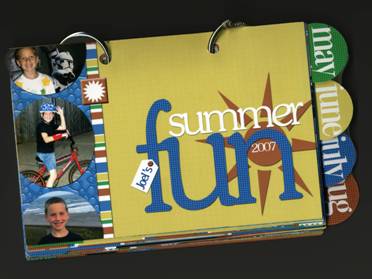
 PictureMate mini-albums are a great way to showcase your layouts in a portable size. Traditional or hybrid pages can be scanned, while digital pages can be resized to fit the PictureMate paper size. By printing your pages at 4 inches square, you can create an album of your favorite scrapbook pages that is perfect for tucking into your tote bag. PictureMate mini-albums are a great way to showcase your layouts in a portable size. Traditional or hybrid pages can be scanned, while digital pages can be resized to fit the PictureMate paper size. By printing your pages at 4 inches square, you can create an album of your favorite scrapbook pages that is perfect for tucking into your tote bag.
NOTE: it would be great if we could link this up to the article on printing layouts in custom sizes.
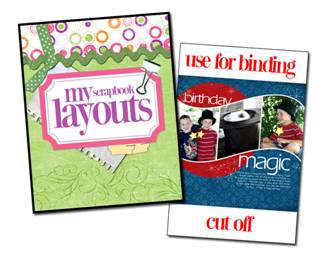
Printing a square layout in the center of the rectangular PictureMate paper creates a small white border above and below your layout. The white border at the top of your layout makes a nice space for binding, while the bottom border can be trimmed off. With our downloadable cover design, you can complete this project in minutes.
Binding Your Mini-album:
You have many creative choices when it comes to binding your PictureMate mini-album together.
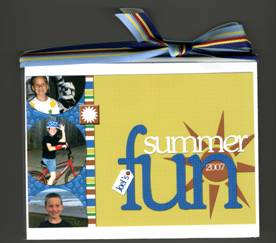
Photo Albums:
Discount stores and dollar stores are a great place to find inexpensive photo albums which are perfect for quickly binding your mini-album pages.
Look for snapshot albums that have a removable cover photo so that you can slip your own cover into the album.
Ribbons and other embellishments are a great way to personalize your binding.
 Metal Rings: Metal Rings:
Office Supply stores and discount stores carry metal binder rings that make quick work of binding your pages. Simply punch holes in the top or side of your mini-album pages and slip them into the rings.
Spiral Binding or Comb Binding:
Many local copy shops offer inexpensive spiral binding and comb binding services. You can even have your cover laminated for protection.
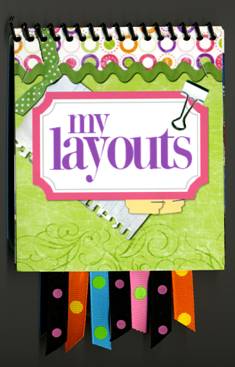
Ribbon Binding:
Ribbon makes a decorative and functional binding for your mini-album. Here we have punched a hole in the top of each of the pages, then tied ribbons to bind and decorate the album.
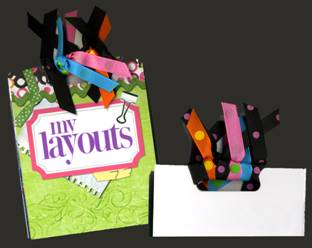
Ribbon bindings can also be used to create an accordion-style album. Just tie the decorative ribbons to join the edges of the pages.
Use whatever creative ribbon placement suits your album design.
Once bound, you can enjoy your PictureMate mini-album, knowing that the pages are smudge, fade, scratch, and water resistant. You'll have no worries about handling these pages.
Your personal photo lab makes a great tool for creating a keepsake album that can be enjoyed and treasured for years to come.
|