|
|
|
|
|
|
|
|
| |
|
|
|
| |
 |
Adobe Digital Scrapbooking Tip – Scalloped Brush
By Linda Sattgast
Sponsors: Adobe Systems Inc. and Scrapper’s Guide
|
|
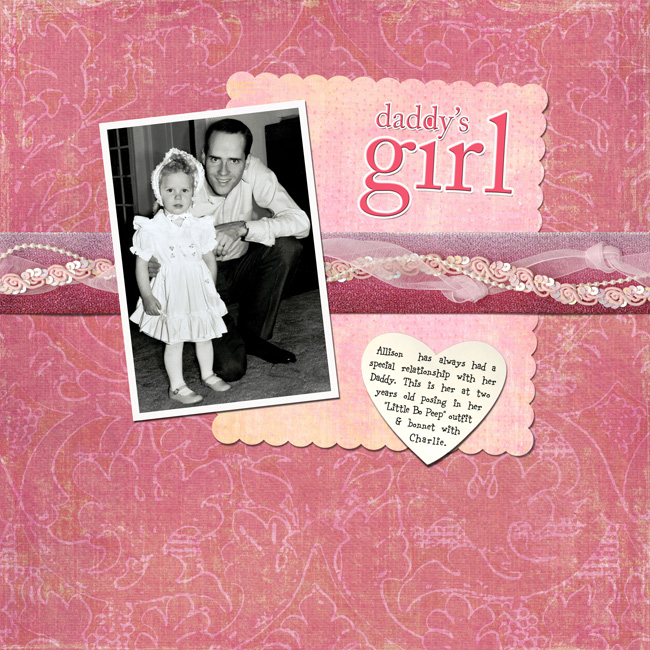
Scalloped Brush
There's nothing that says feminine and sweet like a scalloped mat! Here's how to make one:
(Directions for Adobe Photoshop Elements)
|
Instructions: |
Create the scalloped edge
- Select the Brush tool and open the Brush Picker in the Options Bar.
- Choose a hard edge brush like the #19 pixel brush near the top of the Brush Picker.
- Close the Brush Picker and press the right bracket key until the circle is the size you want one scallop to be.
- Click on the down facing triangle to the left of the brush icon at the far right in the Options Bar, and deselect any check marks for Pen Pressure.
- Click on the brush icon at the far right of the Options Bar and increase the spacing by moving the "Spacing" slider to the right. In my example, I used 80%, but your percentage may differ.
- Click on the "Create a new layer" icon at the top of the Layers palette.
- Click and drag a line of scallops to the right while pressing the Shift key to keep your line perfectly straight. Make the line the length you want your mat to be.
- Press Ctrl J (Mac: Cmd J) to duplicate the brush stroke layer.
- Get the Move tool, click on the brush stroke, and drag it straight down while pressing the Shift key to keep it moving in just one direction.
- Click on the "Create a new layer" icon at the top of the Layers palette to create another new layer.
- Get the Brush tool and make the side of the mat by clicking and dragging a vertical line, starting at the top, right corner and dragging straight down to the bottom, right corner while holding the Shift key.
- Duplicate the vertical layer by pressing Ctrl J (Mac: Cmd J).
- Use the Move tool to click and drag the vertical copy to the left while pressing the Shift key to keep it moving in just one direction.
- If the bottom scallops don't line up perfectly, get the Move tool, make sure Auto Select Layer is checked in the Options Bar and click on the bottom line of scallops to select it. Then use your Arrow keys to move it into place.
Finish the Mat:
- Get the Rectangular Marquee tool and click and drag a rectangular selection around the inside (empty) area of the mat.
- Choose Edit > Fill Selection > with the Foreground Color.
- Chose Select > Deselect.
- Select all the mat layers in the Layers palette by clicking on one and shift clicking on the last one.
- Chose "Merge Layers" from the Layers palette flyout menu.
- Open a file of digital paper (File > Open).
- Use the Move tool to click and drag the paper onto your mat document and place it directly over the mat.
- Choose Layer > Group with Previous to make the paper show up only on the mat.
|
|
|
Guest: |

Linda Sattgast
|
|
|
|
 |
|
|
 |
|
Copyright © 2008 Scrapbook Memories, All Rights Reserved |
|
 |
|
 |
|
|