Supplies:
Elmer’s® Craftbond™ Tacky Glue
Elmer’s® Craftbond™ Fabric and Paper Glue
Elmer’s® Craftbond™ Glue all
Elmer’s® Craftbond™ Ultra Stix All Clear
X-ACTO® Knife
X-ACTO® Razor Trimmer
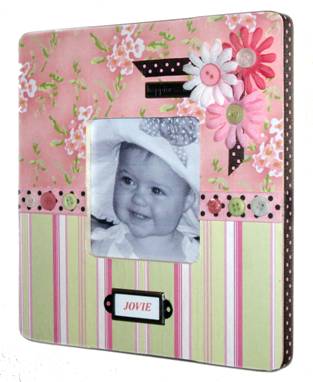
Walnut Hollow wood frame
Embellishments – Buttons, Silk flowers, ribbon, metal charms and accents.
Foam Brush
Instructions:
1. Sand edges of wood frame as needed. Remove sanding dust with a soft, slightly damp cloth, or tack cloth.
2. Using the foam brush, cover the surface of the wood with glue all. You may need to do small areas at a time depending on the humidity, since this will determine how quickly the glue dries.
3. Place paper onto the wood extending over the sides and the opening. Smooth with a soft cloth, or paper towel. I only used two pieces of paper in my project, but you can use just one, or as many as you like. Let dry. Depending on the type of paper you use, you may get unexpected wrinkles. Don’t worry if this happens, you can flatten them, or sand them. It will just add to the charm of your finished pieces.
4. Turn the frame face down, then trim away excess paper with the X-Acto knife.
5. Use fabric glue to adhere gros grain ribbon around the outside edge of the frame. The silk flowers were also attached with fabric glue; the buttons with tacky glue and the metal accents with ultra stix all.
6. Trim photograph to size then place in frame. Enjoy!