Close this window to return to series
400 project listing |
Adding
Motion to your Pages
by: Jeanne Norman Sarna |
| Materials
Needed |
 |
| |
 |
Page Additions – Spin-N-Wheel™ |
| |
 |
Pages Additions – Circle Index™ |
| |
 |
Page Additions – fibers |
| |
 |
Grafix vellum |
| |
 |
Club Scrap paper |
| |
 |
Xyron – permanent adhesive |
| |
 |
3M - Scotch™, double stick tape
(Photo & Document Mounting Tape) |
| |
 |
Glue Dots |
| |
 |
Fiskars – clear mounting stickers |
| |
 |
Making Memories – metal glue
Clearsnap, Ancient Page™ - sage & fabrico, sky mist ink |
| |
 |
American Crafts – Slick Writer
pens |
| |
 |
Stampendous – marble stamping
cube (TC01) |
| |
 |
Frances Meyer – page protector |
| |
 |
Charm |
| |
 |
Jump ring |
| |
| Instructions |
| |
1. |
Decorate wheel and frame. If desired stamp or sponge
the wheel background, edge of the wheel. Stamp or sponge a frame
to match if desired. |
| |
2. |
Cut circles. Using the template in the package to
gauge the correct size of circle use your favorite cutting system;
cut 8 (eight) photos into circles (or if desired journaling circles). |
| |
3. |
Place photos on the wheel. Select the order of the
photos, any photo can be the starting point. The photos will overlap
slightly (this keeps them from getting hung up as they spin). Use
the marking on the wheel when lining up the photos. It’s helpful
to place a pen or pencil under the first photo edge so the last
photo can be tucked under and keep the overlap going the same direction. |
| |
4. |
Cut openings. Place the cover sheet in the page protector
and use as a template to cut wheel opening, this is where the wheel
will be turned, remove the cover piece to continue. Attach decorative
paper to cover piece, turn over and cut openings for viewing window
and wheel openings. |
| |
5. |
Final assembly. Use paper fastener to attach the
wheel to the page. Decorate page as desired. Insert page into page
protector. |
| |
Special
Notes:
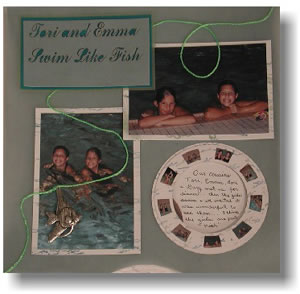
On this sample we have used a Circle Index Stamp-N-Frame™
to embellish the page and five a glimpse of what’s inside
our wheel. To assemble the Circle Index, cut the index prints apart
and use acid free single sided tape to attach the index prints,
to the inside of the frame, then attach both pieces to page.
|
| Sponsor:
Page Additions™ |
|