| Close this window to return to series
400 project listing |
| Epson
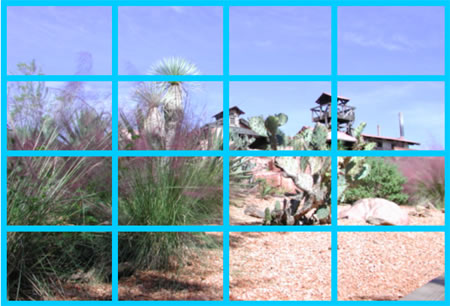
computer tips: Instant ink jet mosaics |
| Did you know that you
can create instant ink jet mosaics – with no cutting and
pasting– using Microsoft Word?
1. Using Word,
go to “Table”
2. Select ”Insert”
3. Select the number
of rows and columns
4. Move your cursor
down; make sure that the cursor is outside the table area. Hit
enter and position cursor below the table.
5. Select ”Insert
Picture”, and choose a photo from one of your photo files
6. Make sure that
picture is selected, and then right click on the picture. Scroll
down to format picture.
7. Then go to the
”Layout” tab
8. Select ”Behind
Text”
9. Then with your
mouse, slide your photo behind the table.
10. Then go to “Table”
11. select “Table
properties”
12. Click on “Borders
and Shading”.
13. Here you can
choose the size and the color of your borders. It looks best when
you choose a color that matches your layout background, so that
it looks like you glued all the little squares of photos onto
your background.
Create the mosaic in Word; print it out, then glue onto your
layout. If you’re doing it this way, use the same kind of
paper on the layout as you use on the Mosaic, so it looks like
just one piece of paper.
If you are creating a digital page, copy the completed Mosaic
into your layout by clicking on “Table“ in your toolbar,
select “Table“, then “Select“ and copy.
You can then paste it into your layout.
|
 |
| Sponsor:
Epson America |
|