Close this window to return to series
600 project listing |
Epson
Computer Tip: Using a photo as your background page in Word
|
| Materials
Needed |
 |
| |
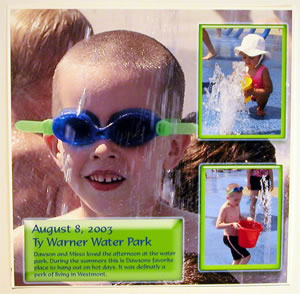
A hot trend right
now is to use an actual photo as the full background, or for
most of your scrapbook page. This technique adds an interesting
element beyond just a color or a pattern page.
One thing that’s important to note is that your photo
needs to be a big enough image file so that the quality, when
printed looks crisp and good. So here’s a tip! If all you
have is a small 4x6 print of an image that you want to use as
big as 12x12, just scan it at a high enough resolution to print
at that size. If you tell your scanner how big you want your
final print, it’ll figure out the print at that size. If
you tell your scanner how big you want your final print, it’ll
figure out the math for you. So based on the size and resolution
of your original, you may need to scan it first. |
| |
If you know how to print a photo, it’s then
just a matter of printing to the size of your page. You may use
12x12 pages, in which case you would need to print on a wide
format printer, with 12x12 photo paper. Or, may you use letter
size pages or 8x8 pages in which case, a letter size photo printer
will suit you fine.
You can use any type of photo software to print your photo.
But here’s a surprise – you can even use Microsoft
word. To print a 12x12 page:
Set page size to print as 12x12. If you’ve not printed
this page size you may need to type in the size
- Next, insert a text box, and drag it to fit the whole surface
of the page
- Choose, Format Text Box
- Select Fill Effects, under the Color/Lines tab
- Select Picture, and pick the photo you want to place in there
- If you don’t want a line around your page, click on “no
line”
Lastly, most people make it much lighter in color so that it doesn’t
distract from what else is added to the page. Make the photo more
muted, by again clicking on Format Text Box and sliding the transparency
gauge until it’s as light as you like. |
|