Family Military History Handbag
By Vanessa Spady
|
| Materials
Needed |
 |
 |
True Colors Patterned Paper (Forest Camouflage), Memories in Uniform
|
|
True Colors Patterned Paper (Desert Camouflage), Memories in Uniform
Cardstock |
|
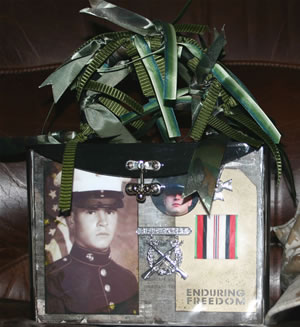
Enduring Freedom Ribbon Tag, Memories in Uniform |
|
Vietnam and Korea Ribbon Tags, Memories in Uniform |
|
Vietnam Map laser cut, Memories in Uniform |
|
Frontline Hero laser cuts, Memories in Uniform |
|
Creative Clazzic Handbag, Z Becky Brown |
|
Vintage Photo Distress Ink |
|
Espresso Dye Ink Pad |
|
Peeled Paint Distress Ink Pad |
|
Inkjet Transparency |
|
Uniform badges or other personal memorabilia |
|
Spray adhesive, trimmer, embossing stylus, stipple brush, low-tack tape, double-sided tape, various ribbons, photos |
| Sizes: |
| |
Front: 7 ½ wide by 5 ¾ high |
| |
Back: 7 ½ wide x 5 ¼ high |
| |
Sides: 4 ½ wide x 5 ¾ high |
| |
| Instructions |
| 1. |
Cut cardstock (color unimportant) to size for each side to above dimensions. |
| 2. |
Cut appropriate patterned paper to size for each side of the purse, set aside. (Desert Camouflage on front and back, Forest Camouflage for both sides) |
| 3. |
Adhere patterned papers to cut cardstock pieces. |
| 4. |
For each side, distress the paper. First, use a light-tack tape to gently pull off the top layer of paper in some areas. Next, run your fingernail around the edges of the papers to roughen them up. Then, use sandpaper around all edges to expose the white core and prepare the paper for ink. Finally, rub the side of an Espresso inkpad around the edges to give them a darker, aged look. |
| 5. |
Set all of your distressed panels aside (you should have all of the bases for each side prepared now.) |
| 6. |
Print an LES (Leave and Earnings Statement) or other personal military memorabilia onto an inkjet transparency (remember to print on the rough side of the transparency). |
| 7. |
Using spray adhesive, adhere your transparency to the front panel. |
| 8. |
Next, prepare your laser cuts by assembling/adhering as necessary. |
| 9. |
Distress laser cuts by dipping a stipple brush into brown and green ink and lightly pouncing onto the tag. You may use an embossing stylus or other small round instrument to get larger dots onto the piece. Ink around the outside edges of the laser cuts and tags to further distress. |
| 10. |
Repeat this process with each laser cut you’ll be using on your project. |
| 11. |
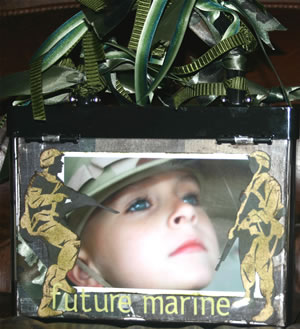
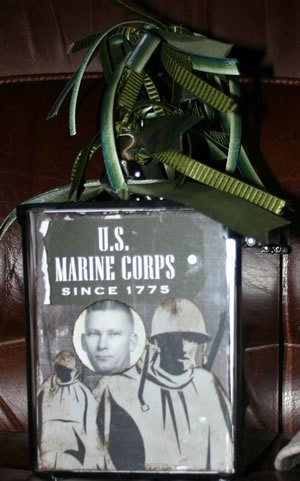
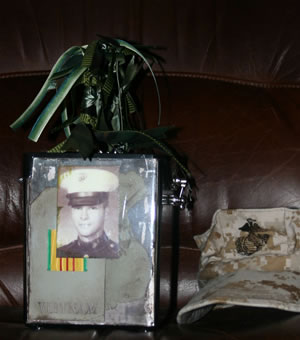
Assemble your layouts by adding laser cuts, photos, and memorabilia to each side as shown in photos. |
| 12. |
Place inserts into Creative Clazzic handbag and then embellish with various ribbons tied to the handle. |
 |
 |
| Sponsor:
Memories in Uniform |