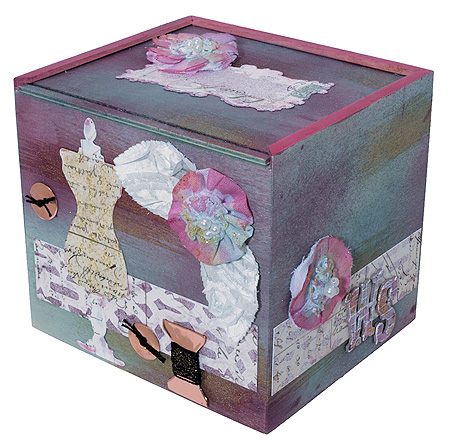
Card Keeper Box
Materials:
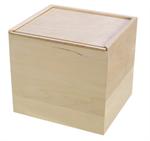
Walnut Hollow® - #38365 Card Keeper Box
Creative Metal®, #38201 Copper
DecoArt® Americana - Bahama Blue, Cranberry Wine, Dioxazine Purple, Purple Cow, Royal Fuchsia; Glazing Medium; Twinkles - Champagne
Pink Paislee – Mistable Papers, Journal Tags, Alphabet
Prima® – Flowers and Leaves
Tombow® – Power Tabs, MONO Aqua Liquid Glue
Royal & Langnickel® – Brushes: Fan, Filbert, Large Flat
Westcott® – Scissors
Tsukineko® – Walnut Inks
Sizzix® – Tim Holtz Alterations, Sewing Room
Other supplies: 3 small plastic cups, #5 black perle cotton thread, old scruffy
brush or toothbrush, paper towels, scissors, water container
Directions:
- In 3 separate small plastic cups, mix Glazing Medium with Bahama Blue (BB), Glazing Medium with Purple Cow (PC), and Glazing Medium with Royal Fuchsia (RF) according to manufacturer’s instructions. Use large flat brush to paint entire Card Keeper Box with BB mix. While still wet, brush PC mix here and there. Use a light touch – the paints will blend together. Let dry.
- Spatter entire box with BB mix, PC mix, and RF mix using old brush or toothbrush. Let dry thoroughly. (Note: Add water to paint mixes if they are not thin enough to spatter.)
- Use large brush to paint all Papers, Journal Tag, and Alphabet Letters with BB mix, PC mix and RF mix. Blend colors together as you add them side by side. Pick up a little Raspberry Wine (RW) and/ or Dioxazine Purple (DP) on brush to add small areas of darker colors. Let paints set, then blot off the resist areas. Set aside to dry.
- To help the paints bleed into the fabric flowers and leaves, use filbert brush to add water to each leaf and flower. Lightly brush on all three colors onto the flowers, letting colors bleed and soften into the fibers. With brush, pick up a little RW and/ or DP to add a little more punch to the flowers. Use paper towel to blot color off pearls. Use only BB here and there on the leaves to keep them light. Set aside to dry.
- Place a Power Tab on the back of the Copper Metal Spool, Attach one end of black perle cotton thread and wind around the spool. Press other end of thread in place on back of spool.
- Add black perle cotton thread to Copper Metal buttons. Double the thread and place through both holes tying a square knot on top of each button. Use scissors to cut excess thread.
- Use filbert brush to add a couple of coats of RF mix around top edge of Box and very front edge of lid.
- To add glitter, use fan brush to add Twinkles here and there on sides and lid of Box, on paper dress form, paper strips, letters, flower petals and centers, and thread wrapped around spool.
- Once everything is dry, use MONO Aqua Liquid Glue to adhere paper strips to sides of Box. Use scissors to cut the bottom of dress form stand. Slide stand under dress form so that the form fits the front of the Box and then glue in place. Adhere journal tag on Box lid and leaves on front of Box.
- Use Power Tabs to adhere flowers and Copper Metal pieces on Box.
- Remove paper from back of letters and press in place on right side of Box. (Note: The letters are self-adhesive.)
|