|
| 304-3 | Print | Close [X] |
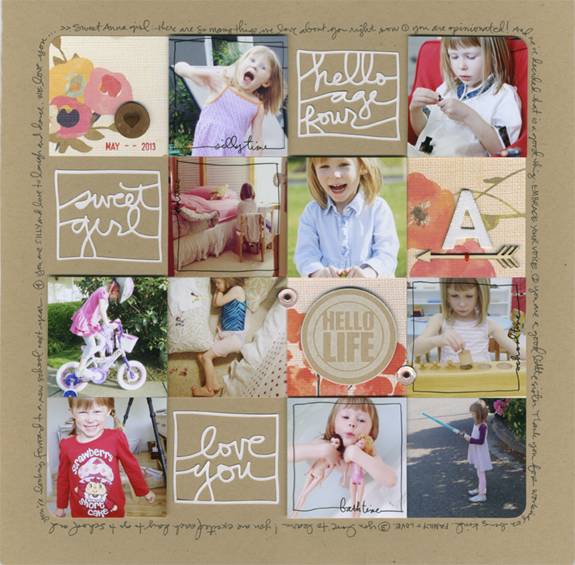
Ali Edwards shares a scrapbook grid layout that celebrates daily life. Watch the video for this project at: |
For More Information Visit:
|


SUPPLIES STEP BY STEP 1. Begin with a sheet of 12x12 kraft cardstock. IDEA NOTE/DISCUSSION TOPIC: This layout will be a grid that includes 16, 2.5 inch x 2.5 inch squares. Those squares will be a combination of photos, pattern paper and embellishments. Journaling will be around the outer edge of the layout. 2. Print 9-12 photos. 3. Crop photos to 2.5 inch x 2.5 inch. I cropped mine in Photoshop first to 3 inch x 3 inch and placed six photos on an 8.5x11 sheet of photo paper. I cut around the edge of the photos and then used a Marvy square punch to get them down to 2.5 inch x 2.5 inch. IDEA NOTE/DISCUSSION TOPIC: When choosing photos I looked for a variety of up close and far away. I like that each type of photo tells a different story about where she’s at in life right now (a combination of silly and serious). I use Photoshop a lot for cropping, editing and printing photos. 4. Hand-draw three square designs to use as accents. Scan and cut with a die cutting machine. (I don’t know the name of the new machine that Julie has access to – I will be bringing some that I have cut on the Silhouette). 5. Punch 3, 2.5 inch x 2.5 inch pieces of pattern paper from the Sweet Blossom Stack from Die Cuts With A View. These will become little canvases for adding embellishments. IDEA NOTE/DISCUSSION TOPIC: I often like to punch out patterns where the main portion of the pattern is either to the left, right, top or bottom. That leaves me room for journaling or simply to leave a bit of breathing room in the overall design. 6. Arrange photos, pattern paper squares and die cut squares in a grid pattern on the background cardstock, leaving a border around the outside. Don’t adhere them until the end. IDEA NOTE/DISCUSSION TOPIC: I lay them out initially as a guide to begin making my layout. I don’t always know what I’m going to put in those extra spaces and then I move on to adding embellishments and journaling. 7. (Number 1 Pattern Paper Square): Stamp “hello life” circle onto kraft cardstock using white stamping ink. Punch out using a Marvy 2 inch circle punch. Add ink around the outer edge of the circle. Adhere using foam dots for dimension on top of one of the punched pieces of pattern paper. 8. (Number 2 Pattern Paper Square): Add a date stamp with red ink to one of the three pattern paper squares. Add a small wood circle embellishment above the date stamp. 9. (Number 3 Pattern Paper Square): Adhere Studio Calico wood veneer arrow with rolling adhesive or Martha Stewart Glue Pen onto third pattern paper sqaure. Add the first initial of the person’s name above using a dimensional letter sticker. 10. To add a bit of color and texture use embroidery floss to keep the letter sticker and wood arrow in place. Poke through the front of the design first to assure you are in the right place. 11. Round edges of the four outer corners (might be photos or they might be pattern paper squares). 12. Choose three to four photos to hand-draw a border with a sentiment using an American Crafts Precision Pen. This could also be done digitally before printing your photos. 13. Adhere everything down. I start on the top right corner and go down, then back up to the top of the next column. Choose a few to adhere with foam dots for dimension. Save the die cuts for last. 14. Add two sequins on top of each other and pierce a whole through the layout on both sides of the “hello life” square. Attach with silver mini brads. 15. Hand-journal around the outer edge of the grid content. IDEA NOTE/DISCUSSION TOPIC: I love to think of this sort of journaling almost like a love letter. It’s such a great opportunity to record/tell people how we feel about them. This is usually very free flowing. I don’t plan in advance exactly what I’m going to say – I simply start writing and stop when I get to the end. 16. Add white ink around the edge to complete the layout. For more information visit |
Julie Fei-Fan Balzer & Ali Edwards |
|