Instagram-Friendly Recycled “Smoosh” book:
By Jenny Barnett Rohrs
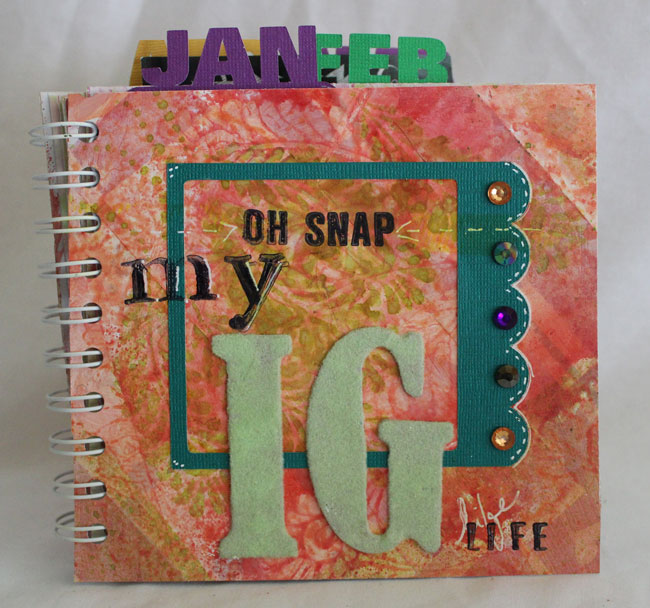
Do you have a purse littered with stubs and bits that you mean to scrapbook one day? Do you have pics on your phone or photo-sharing stream (such as Instagram)? Lastly, do you have a stack of paper that you really don't care for anymore? Well, you can make this Instagram-friendly "Smoosh" (Smash-style) book in an afternoon and get your memories out of the digital world and into your hands. And it's a stash-buster, too!
You'll need:
- 12” x 12” paper that you don't love anymore
- Cereal box cardboard cut to 6” x 6”
- Gesso
- Watercolorsk, spray inks or mists (optional)
- Foam brush or palette knife
- Paper trimmer
- Book binding method of choice (I used the Cinch)
- Adhesive
- Die-cut Month Tabs (optional)
To create the book:
- Cut your 12” x 12” paper in half. Fold the pieces to create 6” squares. Use a tape runner to adhere them together, leaving one side open for a pocket, if desired.
- Using the gesso, apply a thin coat over the papers to "knock back" the designs. You can apply with a brush directly onto the paper, or use a stencil to create a new pattern or texture. Tint with spray inks or mists if desired. Set aside to dry.
- To make the covers, apply strips of paper on top of your cereal box cardboard. Repeat step 2 and apply gesso and color to the covers. Set aside to dry.
- Assemble your book using a book-binding method of choice. If you don't have a designated machine, you can use a hole-punch. Measure 2” from the top and bottom edges and punch each page individually. Use a library ring from the office supply store to hold your covers and pages together.
- Print out your photos using a drug-store app (I like Walgreen's because they connect with Instagram and print perfect 4” x 4” photos.) Trim to 4” square or less using your paper trimmer, if necessary.
- Organize your paper ephemera, ticket stubs, and photos by month. Use the die-cut tabs to separate and organize your media.
- Now "smoosh" your papers and photos into your book. Add a little journaling to jog your memory!
For more information visit www.crafttestdummies.com |