Epson
Computer Tip:
Making your own “label tape” in Adobe® Photoshop® elements 3.0 |
It’s easy to recreate the popular “label tape” look digitally. All you need is Adobe® Photoshop® Elements 3.0 and the free “Plastique” font. You can download Plastique from www.onescrappysite.com . Once you have downloaded the font, you will need to unzip the file, and move it to your C:\WINDOWS\Fonts directory. |
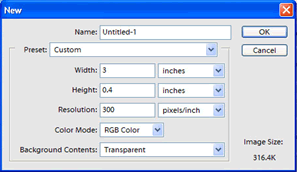
1. First, create a new document by going to File | New | Blank File (or by typing Ctrl+N). Your width will depend on how much you want to type on the tape – here we’ve selected 3 inches long. Make the height 0.4 inches, the resolution 300 ppi, the color mode RGB, and the background transparent, then click OK. A rectangle with a grey checkerboard will appear (the checkerboard pattern indicates that the background is transparent). |
 |
| 2. Next, you’ll need to decide on the color of your label tape. Here we’ve chosen red.. Once you’ve decided on a color, change the foreground color by clicking on the Foreground Color Box at the bottom of the toolbox. When the Color Picker window appears, click on the “H” radio button. Now you can click inside the color slider (rainbow), and/or move around the circular marker in the color field to select a different hue. The new color is shown in the top of the rectangle next to the slider, and the old one is on the bottom. When you have selected a color you like, click OK. |
 |
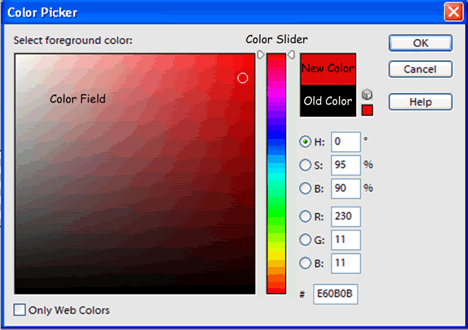 |
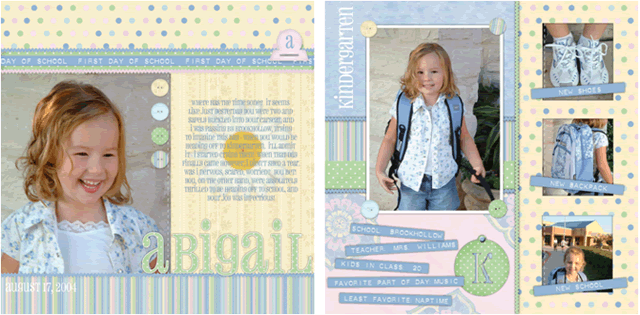
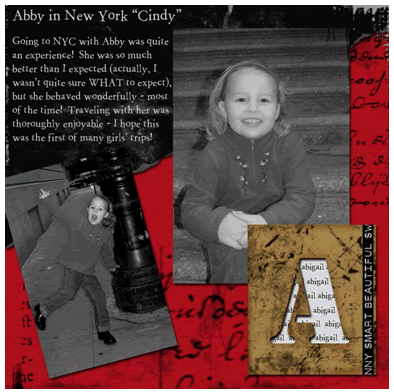
| In the examples below, we chose a color that coordinated with the layout. If you’d like to match the label tape to a color in your layout or photograph, you can do this from the Color Picker window as well. If you move your mouse off of the Color Picker window, it will turn into the Eyedropper Tool and you can click anywhere on your layout to “pick up” that color |
3. Choose the Paintbucket Tool (K) from the toolbox and click once inside the empty rectangle. This will fill the rectangle with the color you chose in the last step. |
4. Now choose the Text Tool (T) from the toolbox. Change the font to Plastique, and the size to 20 pt. Change the font color to white by clicking on the drop down arrow next to the font color box, and choosing white. Click on your rectangle and start typing. When you have finished typing, hit “Ctrl+Enter” or click on the checkmark at the right end of the Text Tool options bar.

|
5. If you need to center your text, select the Move Tool (V) in the toolbox, click on the text, and drag to center it on your label tape. in the toolbox, click on the text, and drag to center it on your label tape. |
6. The last step is to merge the text layer (the words) and the label tape layer (the red rectangle) together so that your label tape can be moved onto a layout or picture as one piece. Go to the Layers menu and select Merge Visible.
7. To add your label tape onto a layout, open your layout file and minimize it so it is in the photo bin at the bottom of the PSE window. Using the Move Tool, click on your label tape, and drag and drop it onto the layout in the photo bin. |
Alternate method: make sure you are in “Multi-window mode” by clicking on the multi-window mode icon at the top right of your PSE window. Select the Move Tool. With your label tape and your layout both showing, click on the label tape and drag it onto your layout. |
 |
If you need to resize the label tape once it’s on your layout, make sure you have the Move Tool selected, hold down your shift key, and drag from one of the corner handles. |
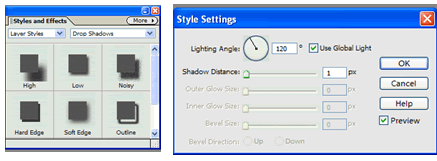
Once the label tape is on your layout, you may want to add a small drop shadow. Go to the Styles and Effects Palette, and choose Layer Styles and Drop Shadows from the dropdown menus. Click on Low. When you add a drop shadow, a little “f” will appear to the right of the layer name in the Layers Palette. If you double-click on that “f”, you can adjust some of the settings of the style you just applied. Decreasing the shadow distance to “1” looks a bit more realistic. will appear to the right of the layer name in the Layers Palette. If you double-click on that “f”, you can adjust some of the settings of the style you just applied. Decreasing the shadow distance to “1” looks a bit more realistic. |
 |
Making your own “label tape” in Microsoft Word
You can create a similar look in Microsoft Word – just follow these few steps:
- Open a new document in Word. You can either leave the document size as Letter (the default) or change the size by going to File | Page Setup and entering the size of the document you’d like to work with. If you want to work with a 12x12 page, on the Paper tab on the Page Setup box, choose Custom Size and enter 12 for the width and height.
- Create a text box of the desired size by going to Insert | Textbox and drawing the text box on your document.
- Click inside the text box to begin typing your text. You’ll want to change your font to Plastique and choose a size that works for your layout (here we’ve chosen to set the size as 20). Once you’ve typed in your text, you’ll want to center it inside the textbox. You can also add a shadow to your text by highlighting it and going to Format | Font and choosing Shadow.
|
 |
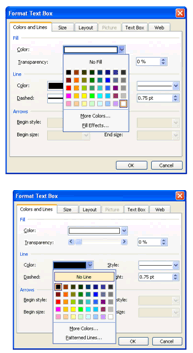
4. Next you’ll want to fill the textbox with color. You can either move your cursor to the edge of the textbox until you see a 4-pointed arrow and double click, or go to Format | Textbox. Choose the color you’d like to fill the textbox by clicking on the arrow next to the Fill Color option. You can either choose one of the colors shown, or choose another color by going to More Colors.
5. Since you don’t want a line to appear around your textbox, set your Line Color to No Line.
|
 |
That’s all there is to it! You’ll now have your text on your label tape! |
 |
 |
 |
 |
| Sponsor:
Epson America, Inc. |