Epson
Computer Tip:
Using the Healing Brush to Retouch Photos |
One of the greatest additions to PhotoShop Elements version 3.0 is the Healing Brush. This tool has been available in the full version of Photoshop since version 7.0, but not in the scaled-down Elements program until now. This tool is especially useful when retouching skin tones because instead of just replacing pixels, which is what the clone stamp tool does, it samples the area and blends the new pixels into the existing ones.
The Healing Brush:
1. Select a photo that needs retouching. You can remove blemishes, wrinkles, freckles and dark circles all with this one technique.
2. Zoom in tightly to the area needing retouching. Use the Zoom Tool (Z) or the keyboard shortcut “Ctrl +”.
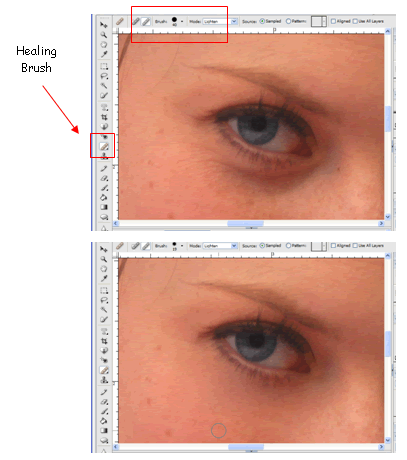
3. Select the Healing Brush Tool from the Tools Palette, which is the band-aid icon, or J on your keyboard. On the Options Bar, under the Mode drop down menu, select Lighten. This option will force the tool to work only on pixels that are darker than our sample area. Also, select a soft-edged brush from the brush drop down menu. |
 |
1. To set our sample area, we hold down the Alt key and click once on an area close to the blemish, but not blemished.
2. Now use your mouse to drag over areas that need to be retouched. In the example I’m showing, I’m going to remove the dark circles and small smile lines. Be careful not to get the eyelashes! After a few strokes, the dark circles are gone. |
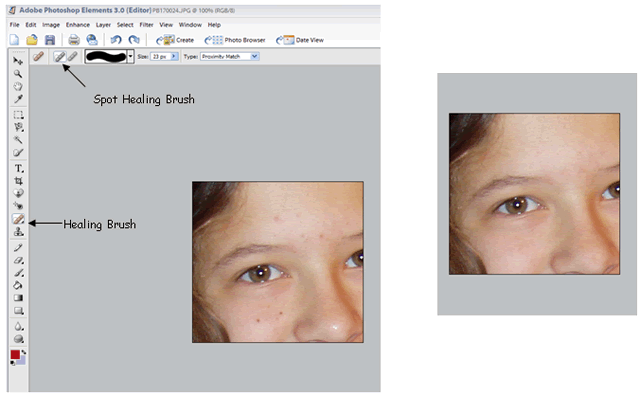
There is also a Spot Healing Brush available that will quickly eliminate small problems on a photo, such as acne or freckles. On the options toolbar for the Healing Brush, choose the Spot Healing Brush. Choose a brush size that is just slightly larger than the area you need fixed. Now instead of setting the sample area by hitting Alt + Click, you just need to click on the area to be fixed. The program will automatically blend the area inside the circle to match the areas around it! It was also used to remove the small glare spot on her nose! |
 |
| Sponsor:
Epson America, Inc. |
|