For project ideas and more, visit:
 www.epsoncreativezone.com www.epsoncreativezone.com
A few good fasteners add a lot to your digital pages –
have fun with them! They can be decorative as well as functional.
And the best thing about digital fasteners is that they can look
as bulky as you wish because they always print out flat!
 To
make your own brads in Photoshop Elements, start with a new file
with a transparent background (go to New | File | Blank File and
create a file that is 2 inches by 2 inches, resolution 300, RGB
Color and Transparent background). To
make your own brads in Photoshop Elements, start with a new file
with a transparent background (go to New | File | Blank File and
create a file that is 2 inches by 2 inches, resolution 300, RGB
Color and Transparent background).
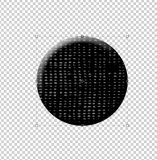
Now click on the Marquee Tool and while holding down the shift
key, use the Elliptical Marquee Tool (M) to draw out a circle.
Use the Paint Bucket Tool to fill your circle with color. Remember
that the foreground color will be loaded into the paint bucket.
If you want to change the foreground color, just click on the
Eyedropper Tool and “pick up” the color from anywhere
in your layout or photo.
Now go to the Styles and Effects Palette, and choose Bevels,
and select Simple Inner. You can experiment with other bevels
to find one you like.
To adjust the shadow size, bevel size and lighting angle, click
on the “f” next to your brad in the Layers Palette.
Use the sliders to create the effect you want. You can add interest
to your brads by cutting them out of patterned paper or decorating
them with brushes, overlays, or textures.
If you want to make your brad out of patterned paper, it’s
pretty much the same thing. This time, however, instead of drawing
a circle on your transparent file, just draw a circle on your
patterned paper. Click on the Move Tool and move this “cutout”
onto your transparent file and finish as above!
To save your brad to use another time, be sure to save it as
a “PNG” file, which will save the transparent background.

Red brads added to 3 corners of the frame around this picture.
The color was “picked up” using the eyedropper tool!
--Black brads made from the black patterned paper on this layout
were added to the four corners of the picture.

|