Epson Computer Tip: Moving a face from
one photo to another
By Barbara Kotsos |
For project ideas and more, visit:
 www.epsoncreativezone.com
 This
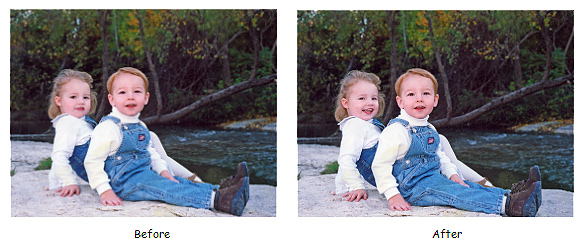
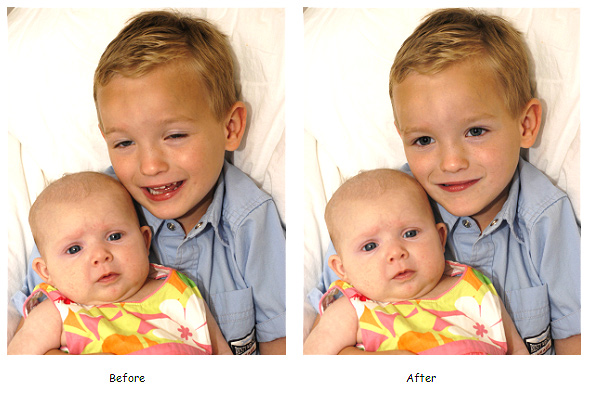
is the perfect technique to foil the goofball in your family -
the one that manages to ruin a perfectly lovely family photograph
by crossing his eyes or sticking out his tongue. The same technique
can be used to “open” closed eyes. Ideally, you have
several pictures that are all fairly similar (taken during the
same photo shoot) to work with. Open up the picture that has the
“good” head. Use the Lasso tool (L on your keyboard)
to draw a selection around the face – it doesn’t have
to be a perfect selection, but try to stay within the skin. (You
could use the Selection Brush to make your selection as well.)
Go to Select | Feather, and enter a Feather Radius of 1-2 pixels. This
is the perfect technique to foil the goofball in your family -
the one that manages to ruin a perfectly lovely family photograph
by crossing his eyes or sticking out his tongue. The same technique
can be used to “open” closed eyes. Ideally, you have
several pictures that are all fairly similar (taken during the
same photo shoot) to work with. Open up the picture that has the
“good” head. Use the Lasso tool (L on your keyboard)
to draw a selection around the face – it doesn’t have
to be a perfect selection, but try to stay within the skin. (You
could use the Selection Brush to make your selection as well.)
Go to Select | Feather, and enter a Feather Radius of 1-2 pixels.
Copy the selection by pressing Ctrl+C. Now open the picture that
you want to move the good head onto. Press Ctrl+V to paste, and
then switch to the Move tool (M on your keyboard). Click and drag
the good face over the bad one. You may need to resize a bit –
to do so, hold down the shift key, click on a corner handle, and
drag to make it larger or smaller. You can also tilt the new face
by moving your mouse just outside the edge of the new face until
your pointer turns into a curved arrow. If you need to change
the color of the new face to match the rest of the picture, press
Ctrl+U (or go to Enhance | Adjust Color | Adjust Hue and Saturation)
and move the sliders until you get a match. You might also want
to use a soft, round eraser to go around the edges of the new
face to help soften the edges.
Now you have a picture that shows the best of everyone!


|
| Sponsor:
Epson America, Inc |
|